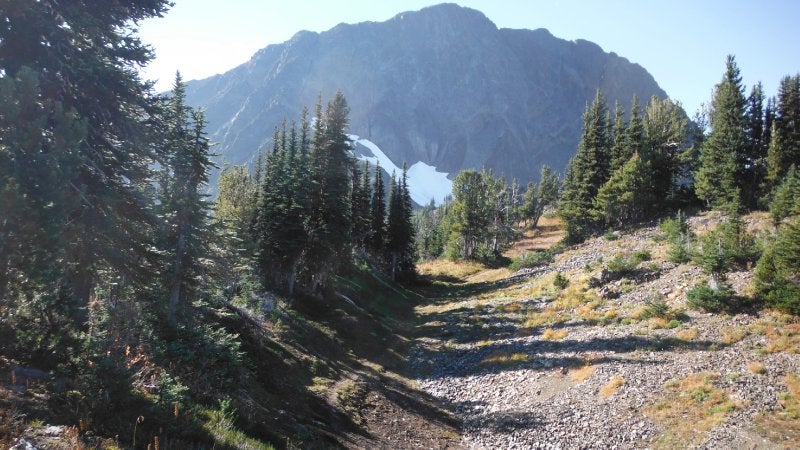
Birkenhead Peak(2506m) is located direct south of Birkenhead Lake and about 30km north east of Pemberton. It's mountain mass is unique as more of an independent type of mountain without continuous ridges to other high peaks.
Birkenhead peak viewed from Microwave ridge

The peak impressively soars from nearby valley bottoms on four directions, and easily identifiable from far away peaks. Its route offers various exciting challenges, but culminating experience for me was brilliant ridge runs at majority of way from Microwave ridge sub peak to final stopping point on Birkenhead ridge.
Basic location maps


=====
BRIEF SUMMARY;
Today's trip was a failed attemped to reach Birkenhead peak turning around at about 2330m elevation. An 8m snow crossing required there at gentle 10-15% incline, but it was so icy I could not negotiate. However a large portion of route has been ascent so I am reporting details here for this rather interesting peak. By using this report other beginners can take up the challenge on this exciting route/peak.
The difficulty of this peak is about upper limit for beginners.. but none of below are too difficult as long as they slowdown and think through, and all of them have a potential for great enjoyment.
Technical element; 1- more than half a dozen sections of fairly steep & slippery scree and soil slope traverse. 2- one loose narrow somewhat steep gully. 3- generally loose broken rocks on relatively steep ascent to Microwave ridge subpeak. 4- some rock block traversing or ascent along the final Birkenhead peak ridge.
Route finding; 1- The goat traverse trail at ascent 2- The correct ridge to descend from Microwave ridge 3- The correct gully for descent to the goat trail/to ascend the ridge.
As for the turnaround point, I am not sure if I could traverse that short section even with crampons with my current ability, but at least to this point, beginners should be able to enjoy/challenge themselves to this exciting ascent, and to the peak when snow is soft.
=====
APPRECIATION;
Thank you all for the posting made on Birkenhead peak, as well as its description at Scrambles book. And I noticed some very nicely dug trail section of slide area traverse- I am guessing it is upgraded by Wandering Tree Frog some days ago. Great appreciations.
=====
ROUTE MAPS


KEY SECTIONS TO NOTE.
It seemed which gully to take to ascend was rather obvious. But at descent, being able to tell 1- to go down the correct ridge, and 2- to find the gulley to go down, was very challenging for me. All gullies looked the same, and I was not aware there was another ridge joining during the ascent, so I ended up going down on the wrong ridge thinking eventually the gully would show up, then something felt wrong and started to traverse prematurely missing the correct route. There are few cairns I saw but with bushes they are easy to miss.
It is important to stay on top of the ridge at descent from Microwave sub peak. This makes it easier to detect a first distinct left(east) fork ridge branching off as forming a large gully. If descend along this correct ridge detecting the cairns and correct descent gully starting on left(east) side would be smooth.


=====
TIME
From trailhead to Micrwave Peak(the point further to north west, closest to Birkenhead col, cairned peak) 1h14min including getting lost at the traverse route finding 3mins. To turnaround point, 2h11mins including adding taking out rocks form shoe 2mins. I am guessing probably I would have reached the peak if snow crossing was easily done in 2h25-2h40mins.
The route is runnable at the very start of the trail before traverse starts, but trail is diverging many times over and going around and cannot get the speed. Also between from sub peak(first peak) of Microwave ridge to Micro-Birken col, and after col boulder ascent to Birkenhead ridge till turnaround point is 90% runnable in slow way. Ridge running is exhilarating no matter how slow!
=====
TRAILHEAD ACCESS
At Pemberton lighted intersection where Petro Canada is turn right. Soon you reach Mt Currie intersection. Follow the sign for D'arcy and go straight. Set odometer to 0.

In about 34km, there is a sign for Birkenhead Provincial Park. Turn left here.

Within 1km, there is a sign for turn off to go uphill. The sign says D'arcy Kinghill/Microwave Forest Service Road. Turn left here. And set odometer to 0 again.

At 2.7k, there is fork. Take right.

At 3.6k, take left and actually go down. There is a small kind sign telling you so.


At 9.2k high up in alpine, there is a fork. Take left or straightish left(no photo).
The road is good but very steep. There are about close to a dozen sections of 20%+ incline stretches. Rear wheel drive cars might not be able to make it. Front wheel drives should be ok by continuing to move up steep sections and slowing down at some of the ruts and where a few rocks scatter. Incline shows at decent photo on the left.


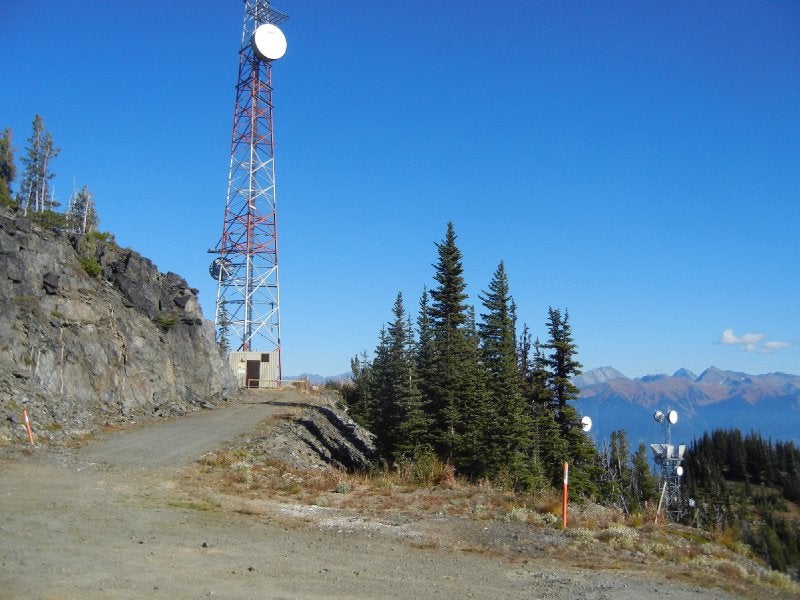
As it takes to a very high elevation(1900m), the view from the car is outstanding! Keep going past first 2 buildings and reach the 3rd tower where trailhead starts.


(left pic)Trailhead parking and starting of the trail(old road) going up on left. (right pic)Microwave towers.

=====
TRAILHEAD TO END OF SLIDE TRAVERSE
The trail goes along this old road which soon ends. Then there is a clear but often diverging trail takes along mainly the ridge, fading before reaching goat traverse trail.


But then locating the traverse trail was quite a challenge. See a cairn on left, also further left and below-behind locate a block of rocks next to tall trees. Helpful to remember them in relation to the entire ridge behind. Right pic shows them with arrows.


Now see the block of rock gets larger as you get closer. Also you can see a traverse trail behind above. From there it is an easy access.


Now, this is one thing I learned for the first time at this trip. It is much easier to focus on where I am going than where I don't want to go. So I focused on getting good foot & handhold and those numerous traverse became straight forward. I realized now that I didn't look down much at all. There is always some kind of a way to hold yourself onto during this traverse if you take your time, then the knowing would come to you.
Sometimes solid rocks, small trees, massive piles of srcree etc. If I didn't see anything, I just picked up a small sharp rock and dug a foot holding, or brushed dirt off holdable rocks. I just needed to go super slow.
They all look like no way to traverse from far away like below.


But actually when I focused on one element at time they were straigtht forward. Far right photo is when I brushed off dirt to find a small protruding firm rock to hold.


They always looked more difficult from far than it was when I got there... More on this.


Now you find the narrow gully to start the ascent. This is the view of the surroundings where it is located. Where I came from(left), gully is just left of this view(centre), where I would end up if I don't go up along this gully(right).


====
GULLY TO ASCENT OF MICROWAVE RIDGE TO BIRKEN COL.
The gully view itself(centre pic), and left and right side of it. Actually I went on the side of the gully half the time where there are more firm holdings. The centre of the gully is the loosest part. I went very slowly to confirm there is a holding for each three of hands or feet, then proceeded to next step.


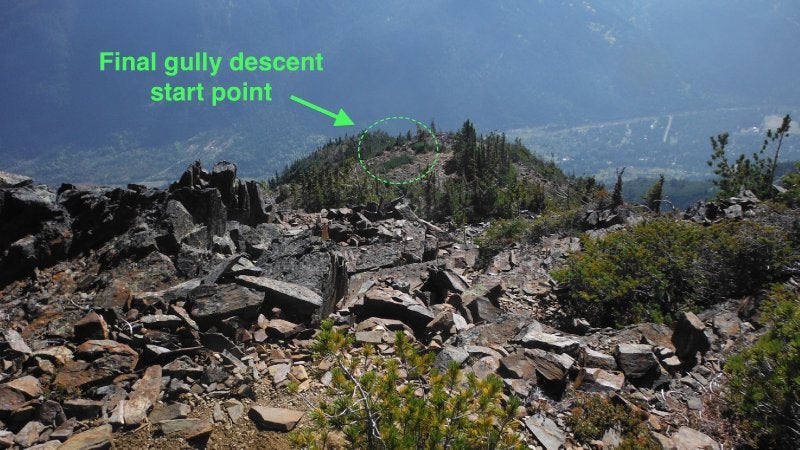
Going up along halfway the gully looks like this(left two). Looking down the starting of gully at descent(right two).


(Far left pic)Then you see the ridge like this, which will join the main ridge that leads to the Microwave peak at the top visible point. Cairn was behind the bush about 15m(centre left). Surrounding view there(right two). So this is the point to find the gully on descent.


Now if you think you are going down a wide gully like this from the ridge on descent, you are on the wrong ridge, you need to be on the ridge shown a little on the left itself. Both pics are showing the same location. Right pic is from Google simulation.


When I got back to the correct ridge on descent, it looked like this(left two). Wrong ridge view(right centre photo). If you were there, you need to swing to the left to traverse the gully and reach the correct ridge. Right photo is Google simulation.


As you ascend further, the view changes(left to right). From far left photo of joint ridge point to showing of Microwave peak.


Looking down. (Left photo)Note this is the point the ridge is starting to devide, so keep an eye on it to descend onto the left(east) ridge. Also traveling on the top of the ridge was almost always easier than being diagonal footstance by traveling on the west(or sloping side) of the ridge. You can tell any exposed place beforehand even if you are running on top of it.


Microwave Peak area is almost the same elevation for a long distance. From a little before the sub peak(which you reach first), rock becomes more stable and nice ridge run starts. Quite delightful! Summit(final peak) cairn on far right.


From there, the fantastic ridge run continues along the ridge as I descend to Birken-Microwave col. From there there is a boulder scrambling then once reached the Birken ridge I continued running again(right photo).


Looking back Microwave peak direction.


Then ascend the left side of the snow field towards Birken ridge from the col(left photo), via boulder field. There was only one water taking spot at the col during the entire trip.


=====
COL TO TURNAROUND POINT 2330M


Only boulder field during the trip to reach Birken ridge(left). Soon Microwave ridge looks nice like this(right).


Birken ridge run view. Very pleasant indeed. Obstacles are either to be gone around to the right or just gone over head on. Good firm rock grip here. Looking down view on far right pic. Make sure to go back to the top of the ridge as soon as possible after you go side ways to avoid the difficulties. The ridgeline was always much easier to travel, and much better feeling also.


You can see where I turned around at this narrowest snow crossing section.

This snow was really icy. I threw down a 70pd rock and it made a small dent, then it glisaded downhill without leaving a mark... like a carling rock. Then used around 40pd rock to dig. But the result after 5mins is on far right pic. Too bad, but this is my ability at the moment. I would have been uncomfortable using crampons to traverse this if I had them. I think commercial heavy duty picaxe might have been possible to make a ditch along this 8m stretch perhaps in 45mins or so for crossing.


It was only 8m, and now if I think of it, I could have tried to dash and slide over to the other side...
=====
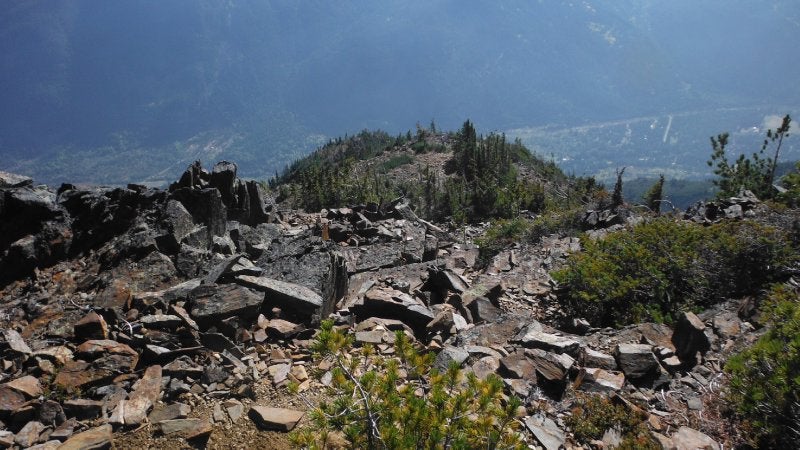
VIEW FROM TURNAROUND POINT & FROM MICROWAVE RIDGE PEAK
Microwave Ridge.

West to Northwest


North to Northeast. I only know centre left is of Downton creek area, & far right pic is Snowcap Mtn.


Towards East


Southeast to South. Matier and Slalok(2nd from far right), Marriot(far right).


Looking all the way down.


CONCLUSION;
This peak is not very popular peak but with an easy road access, small elevation gain and exciting ridge travel I would rather highly recommend this peak. The driving itself is a worthy activity to enjoy a gorgeous view of surrounding peaks. A trip even just to Microwave ridge(Kefir Peak) is fun, too. Suitable for beginners who want to take up a challenge. If the snow is soft, then impromptu rock axe would have done the job easily to cross the snowfield to the peak ascent.

 Beginner partial access guide; Birkenhead Peak


 ]. Lovely report and pictures!


 Your Privacy Choices